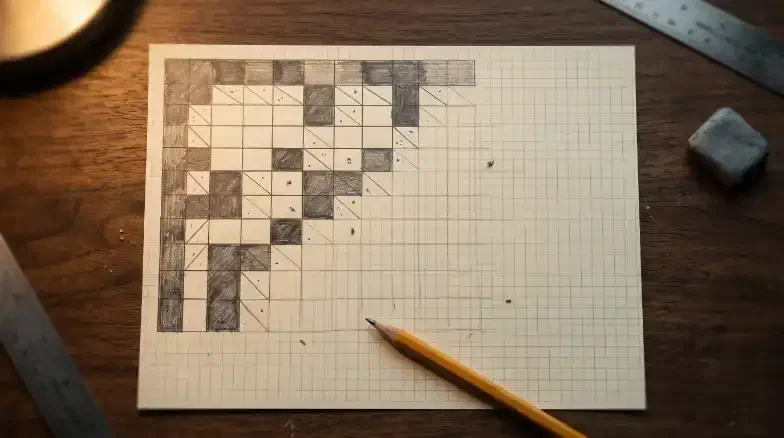
You’ve solved a few hundred Kakuro grids, and one evening you decide to make one. Graph paper, a pencil, an hour. You shade some black squares, write digits in the white ones, add up the sums, and hand the finished puzzle to a friend. Ten minutes later they slide it back across the table. The four cells at the bottom of the grid work as 9 8 over 8 9, and they also work as 8 9 over 9 8. Every clue checks out both ways.
Your puzzle has two answers, and nothing on the page tells you what went wrong.
Solving a Kakuro means following a path someone else built. Making one means building that path yourself and then proving there’s no second way through. That second part is where most first attempts fail, and it’s the part generator tools never explain. This series builds one 7x7 grid from blank paper to finished puzzle, and this article walks the whole route once: the layout, a first fill that fails, a one-digit repair, a difficulty grade, and a harder version of the same grid.
The Anatomy of a Kakuro Grid
The Layout Rules
A Kakuro grid has two kinds of squares. White cells take a single digit from 1 to 9. Black cells hold the clues, or nothing at all. A clue cell is split by a diagonal: the number above the line is the sum of the white cells to its right, and the number below is the sum of the white cells beneath it.
Each unbroken line of white cells is a run, and four rules govern the layout:
- Runs are 2 to 9 cells long. A one-cell run would print the answer in the clue. Ten cells can’t work, because digits can’t repeat within a run and there are only nine of them.
- Every white cell sits in one across run and one down run. A cell with only one direction has nothing to cross-check it.
- All white cells connect. No islands, no corners touching diagonally and calling it a bridge.
- No digit repeats within a run. This is the rule that makes unique solutions possible at all.
Here’s the layout this whole series uses. Row 0 and column 0 form the clue border; the playable interior is 6x6.
+-------+-------+-------+-------+-------+-------+-------+
|#######|#######|#######|#######|#######|#######|#######|
+-------+-------+-------+-------+-------+-------+-------+
|#######|       |       |       |       |#######|#######|
+-------+-------+-------+-------+-------+-------+-------+
|#######|       |       |       |       |#######|#######|
+-------+-------+-------+-------+-------+-------+-------+
|#######|       |       |#######|       |       |#######|
+-------+-------+-------+-------+-------+-------+-------+
|#######|#######|       |       |#######|       |       |
+-------+-------+-------+-------+-------+-------+-------+
|#######|#######|#######|       |       |       |       |
+-------+-------+-------+-------+-------+-------+-------+
|#######|#######|#######|       |       |       |       |
+-------+-------+-------+-------+-------+-------+-------+
It has 24 white cells and 16 runs: six of 2 cells, four of 3 and six of 4. Designing a Kakuro Grid builds it one black cell at a time.
Symmetry
Turn the layout upside down and the black-and-white pattern looks the same. That’s 180° rotational symmetry, and while it isn’t one of Kakuro’s rules (Nikoli lists exactly three, none about layout), it’s the convention for hand-made grids.
Measure it on the interior, not the border. The clue border runs along the top and left, so a half-turn would move it to the bottom and right, and no grid would ever pass. In the series grid, interior cell (r, c) pairs with (7 − r, 7 − c): the black cell at r3c3 pairs with r4c4, and r1c5 pairs with r6c2.
Two Ways to Build: Fill-First vs. Clue-First
Fill-First
Lay out the grid, write a digit in every white cell without repeating within a run, then add up each run to get its clue. It’s fast, and it’s how most computer generators work. The catch is that a valid fill proves one solution exists. It says nothing about a second one, and most fills have several. The series grid was built this way, and its first fill failed exactly like the one in the opening.
Clue-First
Pick a clue, work out what it forces, then pick the next clue to build on that. You solve the puzzle in your head as you write it, which means you control where the solver starts and what each step demands.
Here’s how a clue-first start looks in the series grid’s bottom-right corner. Put a 6 on the three-cell down run along the right edge. Six in three cells can only be {1, 2, 3}. Put a 27 on the bottom across run. Twenty-seven in four cells is {3, 7, 8, 9}, {4, 6, 8, 9} or {5, 6, 7, 9}. The corner cell belongs to both runs, and the only digit both allow is 3. That’s your first forced move. The next clue you choose should build on that 3.
Watch which clues you cross. A 3 in two cells is {1, 2}; a 17 in two cells is {8, 9}. Cross them and the shared cell has no possible digit. Good crossings share exactly one digit: 17 against 16 ({7, 9}) forces 9, and 3 against 4 ({1, 3}) forces 1.
Exactly One Solution
Back to the opening. Here’s the series grid’s first fill, with the four trouble cells in brackets:
+-------+-------+-------+-------+-------+-------+-------+
|#######| 16\   | 12\   | 10\   |  8\   |#######|#######|
+-------+-------+-------+-------+-------+-------+-------+
|   \12 |   6   |   3   |   2   |   1   |#######|#######|
+-------+-------+-------+-------+-------+-------+-------+
|   \27 |   9   |   6   |   8   |   4   | 21\   |#######|
+-------+-------+-------+-------+-------+-------+-------+
|   \3  |   1   |   2   | 24\8  |   3   |   5   |  6\   |
+-------+-------+-------+-------+-------+-------+-------+
|#######|   \8  |   1   |   7   | 17\8  |   6   |   2   |
+-------+-------+-------+-------+-------+-------+-------+
|#######|#######|   \21 |  [9]  |  [8]  |   3   |   1   |
+-------+-------+-------+-------+-------+-------+-------+
|#######|#######|   \27 |  [8]  |  [9]  |   7   |   3   |
+-------+-------+-------+-------+-------+-------+-------+
Swap the bracketed cells to 8 9 over 9 8 and every run still holds exactly the same digits, just in a different order. The 21 across still holds {9, 8, 3, 1}. The 24 down still holds {7, 8, 9}. That’s a swap, sometimes called a deadly pattern, and no clue can catch it because no clue cares about order.
Notice what runs through those four cells: a 24 in three cells and a 17 in two. Both are magic blocks, clues with only one possible digit set. They don’t help. A magic block fixes which digits a run uses, not where they go.
The fix is to change a digit. Change r5c3 from 9 to 4 and recalculate the two clues through it: the row-5 across becomes 16 and the column-3 down becomes 19. Now the only way to shift those four cells would put a second 3 in row 5, and the no-repeat rule kills it.
To prove the repaired grid has one solution, solve it using only forced moves. If every placement is the only option at the moment you make it, there’s no room for a second answer. How to Make Sure Your Kakuro Has Exactly One Solution covers swaps, longer loops and the repair options in full.
Setting the Difficulty
A big grid isn’t a hard grid. Difficulty is the hardest technique the solver must use, and you choose it when you choose the digits. This series grades on four tiers:
- Magic blocks. Read the digits almost straight off the clue.
- Intersections. Compare the possible digits of two crossing runs.
- Region counts. Add a block’s across clues, add its down clues, and the difference is a cell only one direction covers. (No 45 needed; see Mastering the 45 Rule.)
- Parity and chains. Odd/even counting and short if-then chains.
The repaired series grid, with three magic blocks, solves on tiers 1 and 2 alone, so it grades Medium. A second version keeps the same layout, changes every digit, and drops to one magic block. Seven cells fall, then everything stalls until you count the top-left block across against down. That’s a Hard grid built on the same skeleton. How to Set Kakuro Difficulty builds it step by step.
Practical Example: The Series Grid, Start to Finish
Here’s the full route the series grid took, in the order you’d follow on your own grid.
- Lay out a symmetric skeleton. Place black cells in pairs, (r, c) and (7 − r, 7 − c), and check for one-cell runs and disconnected pockets after every pair.
- Fill the digits. Write 1–9 in every white cell with no repeats within a run, then add up all 16 runs to get the clues. This is the draft above.
- Test-solve, looking for a second answer. Check every 2x2 block of white cells for the A B over B A pattern. The series layout has eight such blocks; the swap sits in the one at r5c3–r6c4.
- Repair. Change r5c3 from 9 to 4. Recalculate the row-5 across (21 becomes 16) and the column-3 down (24 becomes 19).
- Prove it. Solve the new grid with forced moves only. The first one is r6c6 = 3, the 6-down against 27-across crossing from earlier. Every other cell follows without a guess.
- Grade it. The hardest step was an intersection, so it’s Medium.
Steps 3 and 4 form a loop. You keep testing and repairing until no second answer turns up:
Here’s the finished puzzle:
+-------+-------+-------+-------+-------+-------+-------+
|#######| 16\   | 12\   | 10\   |  8\   |#######|#######|
+-------+-------+-------+-------+-------+-------+-------+
|   \12 |       |       |       |       |#######|#######|
+-------+-------+-------+-------+-------+-------+-------+
|   \27 |       |       |       |       | 21\   |#######|
+-------+-------+-------+-------+-------+-------+-------+
|   \3  |       |       | 19\8  |       |       |  6\   |
+-------+-------+-------+-------+-------+-------+-------+
|#######|   \8  |       |       | 17\8  |       |       |
+-------+-------+-------+-------+-------+-------+-------+
|#######|#######|   \16 |       |       |       |       |
+-------+-------+-------+-------+-------+-------+-------+
|#######|#######|   \27 |       |       |       |       |
+-------+-------+-------+-------+-------+-------+-------+
One solution, three magic blocks, every move forced. You can print it along with the Hard version and solve both on paper.
A Brief History: From Cross Sums to Kakuro
The puzzle reached most English-speaking solvers as Cross Sums, a name credited to Jacob E. Funk, a Canadian working for Dell Magazines. Sources disagree on the year: some say 1950, while Wikipedia says 1966. In Japan, Nikoli introduced the puzzle in issue 11 of its magazine as kasan kurosu, “addition cross,” and the name was shortened to Kakuro. It stayed the most popular logic puzzle in Japanese print until Sudoku took the top spot in 1992.
Nikoli’s rules for it still fit in three lines: digits 1 through 9, no zeros; each clue is the sum of the cells to its right or below; no digit repeats within a run. Everything in this series comes down to arranging those three rules so a solver can find their way through, and only one way.
Best Practices for Constructors
Do:
- ✓ Solve your own puzzle from scratch, with forced moves only, before anyone else sees it.
- ✓ Keep the interior symmetric if you plan to publish.
- ✓ Give the solver at least one clear place to start.
- ✓ Check every 2x2 block of white cells for a swap before you calculate clues.
Don’t:
- ✗ Assume a valid fill has only one solution.
- ✗ Try to fix a swap by turning one of its runs into a magic block. It won’t work.
- ✗ Use guessing as a difficulty feature. Hard should mean a harder deduction, not a coin flip.
Troubleshooting Common Construction Mistakes
Four cells in a rectangle can trade digits. The rectangle holds A B over B A, so every run through it keeps the same digits. Change one of the four digits and recalculate its two clues, or move a black cell to split one of the runs. To catch it earlier, look for matching digits on opposite corners of every 2x2 white block before you add anything up.
The puzzle has no solution. Usually a clue was added up wrong or a digit repeats within a run. Recheck each clue against the filled grid, one run at a time. To prevent it, always calculate clues from the finished fill rather than writing them from memory.
A crossing has no possible digit. Two crossing clues share no digit, like a 3 in two cells across a 17 in two cells. Change one of the clues (and the digits beneath it) so the two sets overlap.
Where to Go Next
Making a Kakuro comes down to designing a solving path and then proving it’s the only one. The layout decides where the solver can start and where swaps can hide. Pure swaps slip past every clue, so you fix them with digits or black cells. And difficulty is the hardest step you force, not the size of the grid.
Print the series layout and try your own fill, or work through the finished series puzzles. If you’d like to see Kakuro grids doing more than sitting on a page, every door in Escape the Crimson Gala opens with one.
The Kakuro Puzzle Design series:
- Designing a Kakuro Grid: Symmetry, Runs and Black Cells
- How to Make Sure Your Kakuro Has Exactly One Solution
- How to Set Kakuro Difficulty: Technique, Not Grid Size
- Build a Kakuro Solver and Generator in Python
- Designing Kakuro Grids That Hide an Answer