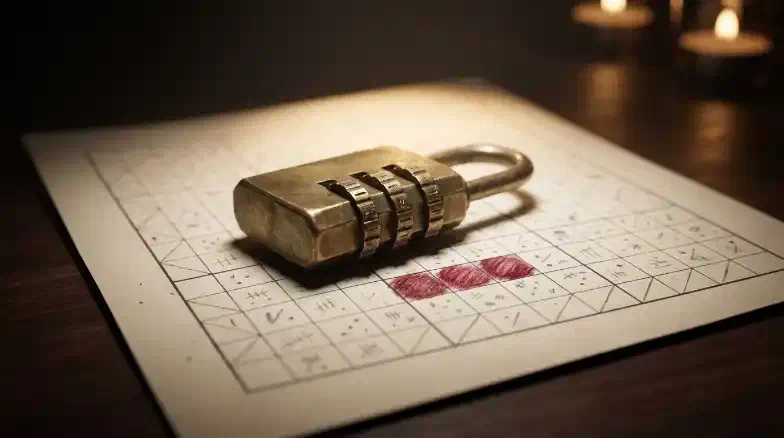
You want a Kakuro that opens a padlock. The lock takes three digits, and the plan is simple: solve the grid, read three shaded cells, turn the dials. Then you try it. You fill the grid first, shade three cells that happen to look nice, and read off 3-8-6. The lock was set to 4-0-7 weeks ago. Your grid gave you whatever digits the fill happened to produce, and no Kakuro cell can ever hold a 0 anyway.
The answer has to come first. The grid gets built around it.
A grid that hides an answer is still a Kakuro: it needs one solution, a fair solving path and a clean layout. On top of that, a few cells have to hold digits you chose before you started. This article covers how to read an answer out of a grid, the digit traps that rule some answers out, how to build a grid around fixed digits, and how to control when the answer becomes readable. It uses the same 7x7 layout as the rest of this series.
Reading an Answer Out of a Grid
Mark a few white cells: shading, a heavy border or a small symbol all work. When the grid is solved, the solver reads those cells in a fixed order to get the answer.
State the reading order, or make it obvious. Normal reading order, left to right and top to bottom, is the safest default because nobody needs telling. The answer can be a lock code, a page number to turn to, or a number that feeds the next puzzle.
Here’s the series Main grid from How to Make Sure Your Kakuro Has Exactly One Solution, solved, with three cells shaded: r1c4, r2c4 and r4c3.
+-------+-------+-------+-------+-------+-------+-------+
|#######| 16\   | 12\   | 10\   |  8\   |#######|#######|
+-------+-------+-------+-------+-------+-------+-------+
|   \12 |   6   |   3   |   2   |  [1]  |#######|#######|
+-------+-------+-------+-------+-------+-------+-------+
|   \27 |   9   |   6   |   8   |  [4]  | 21\   |#######|
+-------+-------+-------+-------+-------+-------+-------+
|   \3  |   1   |   2   | 19\8  |   3   |   5   |  6\   |
+-------+-------+-------+-------+-------+-------+-------+
|#######|   \8  |   1   |  [7]  | 17\8  |   6   |   2   |
+-------+-------+-------+-------+-------+-------+-------+
|#######|#######|   \16 |   4   |   8   |   3   |   1   |
+-------+-------+-------+-------+-------+-------+-------+
|#######|#######|   \27 |   8   |   9   |   7   |   3   |
+-------+-------+-------+-------+-------+-------+-------+
In reading order: 1, 4, 7. That works here because the shaded cells were picked to fit a grid that already existed. For a real lock or a real page, you need the opposite: the digits are fixed, and the grid has to fit them.
The Digit Traps
Some answers can’t come out of a Kakuro at all, and some can only come out of certain cells. Check these before you build anything.
No zeros. Nikoli’s first rule is “Put numbers from 1 through 9 in each cell (No zeros).” So 4-0-7, page 105 or the year 2010 can’t be read straight off the grid. Either choose answers without a 0, or use a conversion like “add the shaded cells together,” which can produce a zero-containing total.
Repeated digits need separate runs. No digit repeats within a run. If your answer is 4-7-4, the two cells holding 4 can’t sit in the same across run or the same down run. In the Main grid above, r1c4 and r2c4 share a down run, which is fine for 1 and 4 but rules out a code like 4-4-7 for those two cells.
Some digits barely fit some runs. A cell in a 4-cell run with a clue of 10 can only hold 1, 2, 3 or 4, because 10 in four cells is {1, 2, 3, 4}. If your answer needs a 9 there, that clue is off the table.
Building the Grid Around the Answer
Step by Step
You’re building a grid on the series layout that hides the code 4-7-4.
1. Pick the answer cells. The two 4s need separate runs, and spreading the cells out keeps the answer from clustering in one corner. Use r2c2, r4c5 and r5c3. Each sits in a different across run and a different down run, and they read in that order left to right, top to bottom.
2. Lock the digits. Write 4 in r2c2, 7 in r4c5 and 4 in r5c3. From here on, those three cells don’t change, whatever else does.
3. Fill around them. Write digits in the other 21 white cells with no repeats in any run, then add up all 16 clues. This is the same fill-first step from the rest of the series, with three cells already decided.
4. Repair without touching the locked cells. The first fill will almost certainly have more than one solution. Change one unlocked digit at a time and keep each change if the number of solutions doesn’t go up, until only one is left. If a swap involves a locked cell, the repair has to break it using the other corners.
5. Check the grade, not just the count. One solution isn’t enough. The grid also has to be solvable by logic.
With the solve-order check from later in this article added, the full loop looks like this:
Doing It with the Series Code
The solver from Build a Kakuro Solver and Generator in Python handles steps 3–5. Its random_fill takes a fixed set of cells, and repair takes a locked set it won’t change:
"""hidden.py: build a grid around a fixed answer, then check it."""
import random
import sys

from kakuro import grade, random_fill, read_grid, repair, with_totals
from generate import to_text

ANSWER = {(2, 2): 4, (4, 5): 7, (5, 3): 4}   # code 4-7-4, read in reading order

with open("layout.txt", encoding="utf-8") as f:
    layout = f.read()
cells, runs = read_grid(layout)
rng = random.Random(int(sys.argv[1]) if len(sys.argv) > 1 else 1)

for attempt in range(1, 11):
    fill = random_fill(cells, runs, rng, fixed=ANSWER)
    if repair(cells, runs, fill, rng, locked=ANSWER):
        puzzle = to_text(layout, with_totals(runs, fill))
        code = "-".join(str(fill[x]) for x in sorted(ANSWER))
        print(f"unique after attempt {attempt}, code {code}\n{puzzle}\ngrade: {grade(puzzle)}")
        break
else:
    print("no unique grid in 10 attempts; try another seed or move the answer cells")
Put it next to kakuro.py, generate.py and layout.txt from that article. The first run, python hidden.py 1, produced a grid with exactly one solution and this grade:
grade: Expert or guessing: needs parity, chains, or search (Tier 4+)
That’s step 5 earning its place. A unique grid can still be one the solver can’t finish without guessing, and a hidden-answer grid that needs a guess is worse than useless: the solver will guess, get the code wrong and blame the lock. Throw it out. Across seeds 1 through 7, four grids graded Easy/Medium, one graded Hard, and two needed Tier 4 or guessing. Every one had exactly one solution, and every one still read 4-7-4. Seed 2 gave this:
+-------+-------+-------+-------+-------+-------+-------+
|#######| 18\   | 16\   |  8\   |  9\   |#######|#######|
+-------+-------+-------+-------+-------+-------+-------+
|   \15 |       |       |       |       |#######|#######|
+-------+-------+-------+-------+-------+-------+-------+
|   \10 |       |  []   |       |       | 22\   |#######|
+-------+-------+-------+-------+-------+-------+-------+
|   \17 |       |       |  8\7  |       |       | 16\   |
+-------+-------+-------+-------+-------+-------+-------+
|#######|   \4  |       |       |  6\12 |  []   |       |
+-------+-------+-------+-------+-------+-------+-------+
|#######|#######|   \26 |  []   |       |       |       |
+-------+-------+-------+-------+-------+-------+-------+
|#######|#######|   \12 |       |       |       |       |
+-------+-------+-------+-------+-------+-------+-------+
One solution, solvable with magic blocks and intersections, three of them in the clues: 10 across in row 2 ({1, 2, 3, 4}), 17 across in row 3 ({8, 9}) and 4 across in row 4 ({1, 3}). Solved:
+-------+-------+-------+-------+-------+-------+-------+
|#######| 18\   | 16\   |  8\   |  9\   |#######|#######|
+-------+-------+-------+-------+-------+-------+-------+
|   \15 |   7   |   1   |   5   |   2   |#######|#######|
+-------+-------+-------+-------+-------+-------+-------+
|   \10 |   2   |  [4]  |   3   |   1   | 22\   |#######|
+-------+-------+-------+-------+-------+-------+-------+
|   \17 |   9   |   8   |  8\7  |   6   |   1   | 16\   |
+-------+-------+-------+-------+-------+-------+-------+
|#######|   \4  |   3   |   1   |  6\12 |  [7]  |   5   |
+-------+-------+-------+-------+-------+-------+-------+
|#######|#######|   \26 |  [4]  |   5   |   8   |   9   |
+-------+-------+-------+-------+-------+-------+-------+
|#######|#######|   \12 |   3   |   1   |   6   |   2   |
+-------+-------+-------+-------+-------+-------+-------+
4, 7, 4. The lock opens.
If you’re building by hand instead, the steps are the same. Write the three locked digits in ink, fill the rest in pencil, and repair with the swap checks from the uniqueness article, never touching the ink.
When the Answer Appears
The order in which cells get solved matters more in a hidden-answer grid than anywhere else. If the solver can read the whole code after a handful of moves, they’ll try the lock and skip the rest of your puzzle.
Look at the 4-7-4 grid. r2c2 sits inside the 10 across in row 2, a magic block, and it’s one of the first cells to fall. The solver has the first 4 almost immediately. That’s fine on its own, because the other two digits hold out. In a straightforward solve, r4c5, the 7, is the 21st of 24 cells placed. The full code isn’t readable until the grid is nearly done.
The Main grid’s 1-4-7 behaves the same way. r1c4 and r2c4 fall around the middle of the solve, and r4c3 is one of the last few cells placed.
To check your own grid, solve it from blank and number the cells as you fill them. Then look at where the answer cells land:
- At least one answer cell should fall late. That’s what keeps the solver solving.
- Not every answer cell should sit in a magic block. A magic block hands its digits over at the start.
- If the whole answer arrives early, move an answer cell. Pick one that falls late in your numbered solve, then lock and repair again.
Wrong Answers
A one-digit mistake in the grid usually shows up as a broken sum somewhere else, and the solver goes back and finds it. But sometimes a slip only affects a shaded cell, and the solver walks away with a wrong answer that looks fine.
For a lock, that’s self-correcting: the lock doesn’t open, and the solver rechecks. For a page number it’s riskier, because a wrong page might happen to continue the story. If 147 is the answer, a single wrong digit gives 117, 127, 137, 157, 141–146, 148 or 149. A book that uses page-number answers needs each of those to say clearly that the solver slipped. That’s book design more than grid design, but it starts with knowing which wrong answers your shaded cells can produce.
Case Study: Escape the Crimson Gala
Escape the Crimson Gala is a murder-mystery escape-room book where every door opens with a Kakuro grid. You’re a rookie officer locked inside the Stanton tower with 400 donors and a killer, and each grid is the next door. According to the book’s description:
- Shaded squares give the page number. Read them in order and turn to that page. Nobody can flip ahead, because nobody knows where the story goes next until they’ve solved the grid.
- A wrong sum lands on a dead end, which tells the solver at once that they slipped and shows them how to find the mistake.
- Ten training grids come first, for readers who’ve never solved a Kakuro.
- All 50 puzzles have exactly one answer reachable by logic.
Each choice maps to a grid-design problem from this series. Page-number answers are hidden answers with the stakes turned up, so every one has to clear the digit traps above. The dead ends handle wrong answers. The training grids are the difficulty ramp from How to Set Kakuro Difficulty: easy grids teach the puzzle before it guards anything important. And “one answer reachable by logic” is the standard every grid in this series is built to.
A Checklist for Hidden-Answer Grids
Run this on every grid before anyone else sees it:
- The answer has no 0, or there’s a conversion rule that handles it.
- Repeated answer digits sit in separate runs.
- The answer cells were locked before the fill, and nothing changed them afterward.
- The grid has exactly one solution.
- The grid solves by logic, with no guessing (Tier 3 at most, unless you mean to go further).
- At least one answer cell falls late in a numbered solve.
- The solved grid reads the right answer in the stated order.
Repeat 3–7 after any change to the grid, even one that has nothing to do with the answer cells. A repair elsewhere can change the solve order, or the grade.
Best Practices
Do:
- ✓ Choose the answer before you build the grid.
- ✓ Lock the answer cells and repair around them.
- ✓ Check the grade as well as the solution count.
- ✓ Number a test solve to see when the answer becomes readable.
Don’t:
- ✗ Shade cells after the fill and hope the digits work out.
- ✗ Put two identical answer digits in the same run.
- ✗ Put every answer cell inside a magic block.
Troubleshooting
The repair never reaches one solution. The locked cells sit on a swap that can only be broken by changing them. Move one answer cell to a different spot (keeping repeated digits in separate runs), lock again and repeat. Answer cells inside 2x2 white blocks are the likeliest culprits, since that’s where swaps live.
The answer is readable after a few moves. Every answer cell falls early, often because each one sits in a magic block or crosses one. Move one answer cell somewhere that falls late in your numbered solve.
The answer changed after a fix. A repair touched an answer cell, usually because it wasn’t locked. Re-lock the answer, restore its digits and repair again.
The grid is unique but solvers get stuck. It needs Tier 4 deductions or a guess. Check the grade; if it’s past what you intended, try another fill around the same locked cells.
Putting It Together
A hidden answer is a constraint you set before the grid exists. Check it against the digit traps: no zeros, and repeated digits in separate runs. Lock the answer cells, fill around them, and repair without touching them. Then check two things beyond the solution count: that the grid solves by logic, and that the answer arrives late enough to keep the solver solving.
Pick a three-digit code with no zeros and build it into the series layout, by hand or with hidden.py. To see hidden answers working across a whole book, Escape the Crimson Gala has 50 grids, and every door opens with one.
The Kakuro Puzzle Design series:
- How to Make a Kakuro Puzzle
- Designing a Kakuro Grid
- How to Make Sure Your Kakuro Has Exactly One Solution
- How to Set Kakuro Difficulty
- Build a Kakuro Solver and Generator in Python